

Summary
If you want to develop GenAI applications, then first of all you’ll need a development environment. In this post I will explain step by step how I set up mine. This will certainly save you a lot of time, as you won’t have to go through the same gruelling trail and error approach that I had to.
What you will need
An LLM will have to run on your computer, so ideally you should have a fairly modern PC, better if with an Nvidia RTX 4000 series GPU. These graphics cards are in fact equipped with an architecture for parallel computing (Nvidia CUDA) and therefore lend themselves very well to running LLMs. Let’s say you can do also without, however the performance will be low. It is also important to have enough RAM memory, ideally minimum 32GB.
The specs of the computer I used for my Dev Environment:
- CPU: Intel i9-10850K @ 3600MHz
- GPU: NVidia RTX 4070 Super
- RAM: 64GB
- Operating System: Linux Ubuntu 22.04 LTS
Some recommendations to avoid wasting your time:
- As the operating system, it is best to use Linux. Some of the things we are going to use work badly in Windows or are not supported at all.
- If you decide to use Ubuntu Linux (the recommended choice), then use the 22.04 LTS version. Do not install a newer version, you will end up with malfunctions and incompatibilities, especially with Docker and Nvidia drivers.
- Do not install Linux on a virtual machine, some of the software to be installed will malfunction or fail. Better to have a dedicated disk partition and configure dual boot with Windows. If you really don’t want to bother with the separate partition, then you can try WSL (Windows Subsystem for Linux) – I haven’t tried it so I can’t say if it works.
- To avoid conflicts and compatibility issues, do not install Docker Desktop, just stay with Docker Engine and its command line.
Software Selection
In my previous article, I described the conceptual architecture of GenAI applications. On a logical level, we must now start to figure out the available products and decide which ones to use for each of the main components of our architecture, which I remind you being the following:
- LLM Server
- Orchestrator
- Vector Database
- User Interface
There is a flood of products in development out there: locally installable, cloud deployable, cloud services, free, paid and fremium. To simplify things, then, I’ll refer only to products that meet these requirements:
- Open source.
- Deployable locally.
- Linux Debian compatible.
- Docker compatible.
- Licensed Apache 2.0 or otherwise installable in Production environments without having to pay a licence fee for commercial use.
LLM Servers
LLM (Large Language Model) servers are specialized servers that host and serve large language models, enabling the execution of complex natural language processing tasks. In GenAI apps they facilitate the generation of human-like text, automating content creation, customer interactions, and other language-based processes. The LLM servers I’ve evaluated for my Dev environment were:
After installing and examining them all, I decided to move on with Ollama only, which was the only one to be fully compatible with my chosen orchestrator (I’m going to talk about it in the next section). Kudos to Jan though, I found it to be really fast, way faster than the other three. Special mention also to LMStudio which provides a wider range of functionality and also seems to be more user friendly than Ollama.
Orchestrators
Orchestrators in GenAI apps manage the coordination and integration of various AI models and services, ensuring seamless operation and communication between different components. They streamline workflows, handle data preprocessing and postprocessing, and optimize resource allocation to enhance the overall efficiency and effectiveness of AI-driven tasks. The orchestrators I’ve evaluated for my Dev environment were:
I shelved Rivet because it doesn’t seem to support any of the LLM servers I am focusing on. Excluded also Langchain, because it is not visual and using it right now would have unnecessarily complicated my learning curve, as there is Flowise which is in fact a visual interface to Langchain. Very interesting instead are Langflow and Dify, potentially even better than Flowise, however I decided not to install them, Langflow because it’s still in preview (and it’s not yet clear to me whether the final version will be open source or paid for), Dify was discarded because it is open source however for production apps it will require a commercial licence.
Going by exclusion then, and also bearing in mind the compatibility with at least one of the LLM servers I looked at, I eventually opted for Flowise.
Vector Databases
Vector databases are specialized data storage systems designed to efficiently handle high-dimensional vector data, which is crucial for storing and querying embeddings generated by AI models. In GenAI apps, they enable rapid similarity searches and nearest neighbor queries, facilitating tasks like recommendation systems, image retrieval, and natural language processing. The vector DBs I’ve evaluated for my Dev environment were:
As far as I could see, all three are good products. Milvus and Qdrant appear to be more scalable than Chroma, however I’d say that the scalability of a GenAI app is not a pressing issue at the moment. Instead, I can anticipate that there was no way to get Milvus to work with Flowise, although the connector exists in Flowise. I will discuss this in more detail in the second part of the article; for the time being, we can be happy just with installing Chroma.
User Interfaces
GenAI apps utilize various user interfaces, including text-based interfaces, voice-based assistants, and multimodal interfaces that integrate text, voice, and visual inputs. These interfaces enhance user interaction by allowing more natural and intuitive communication, catering to diverse user preferences and contexts. For my Dev environment, so far I’ve evaluated these user interfaces:
The configuration steps provided below will install only Open WebUI, you can still install AnythingLLM separately though, to play around with LLM models, as it can also work standalone.
Installation Steps
Following the steps below you will get a fully configured Dev environment, running locally, with the following products installed:
- Ollama
- Open WebUI
- Chroma
- Flowise
IMPORTANT: The commands and configuration files below assume your host operating system is Ubuntu Linux 22.04. Some changes or tweaks may be necessary if you’re running on Windows, or on another version of Linux, or on Mac OS.
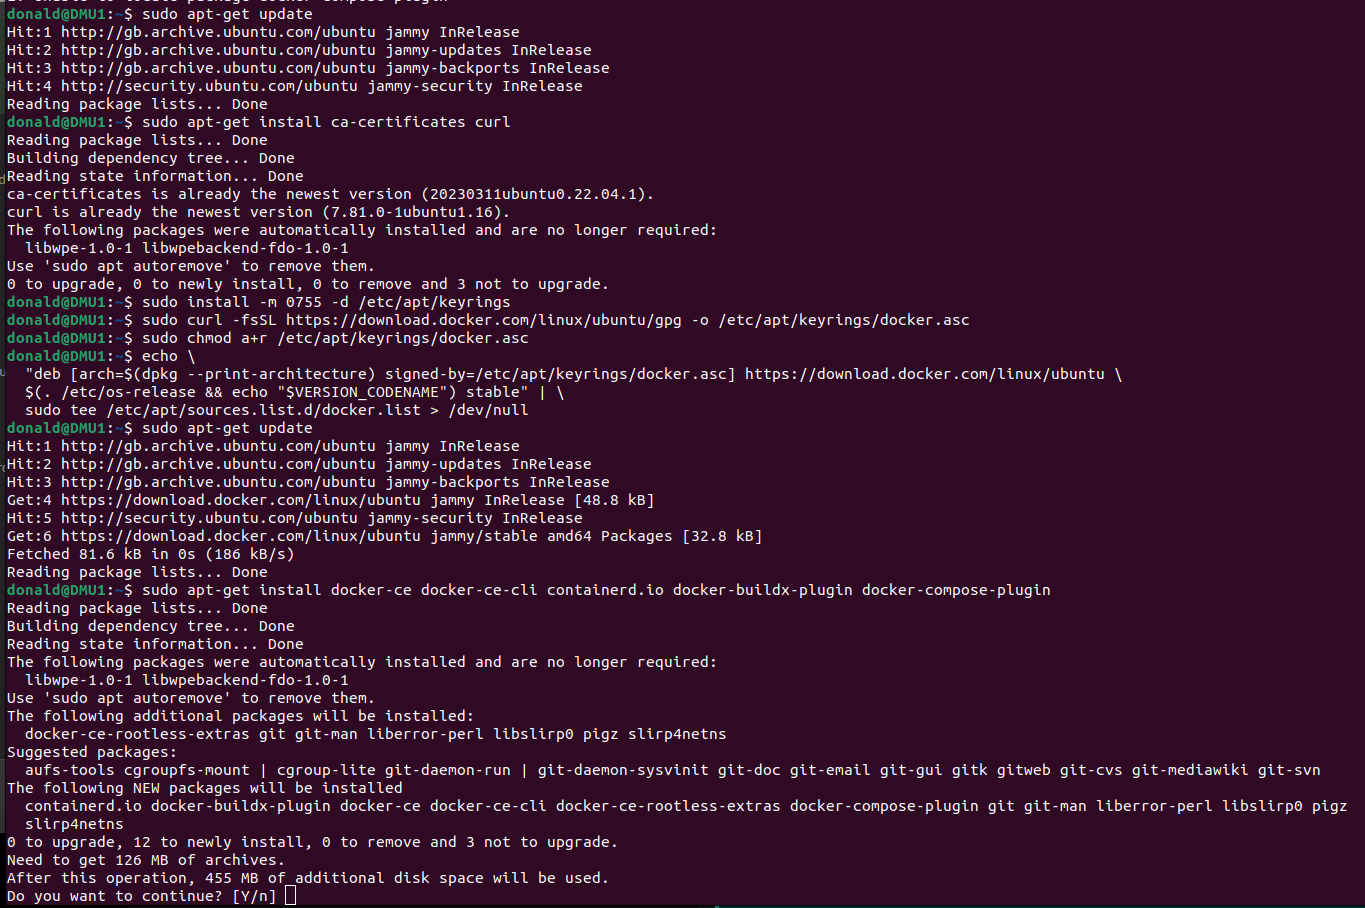
Installing Docker
Make sure the Docker Engine is installed:
Next, install the Nvidia Container Toolkit:

To simplify the execution of Docker commands from now on, you can run it rootless:

Configuration files
Create a folder on your Home directory, then save the code below as “compose.yaml”, this is going to be your Docker Compose configuration:
version: '3.9'

services:
  ################################################
  # Ollama
  openWebUI:
    container_name: ollama-openwebui
    image: ghcr.io/open-webui/open-webui:main
    restart: always
    ports:
      - "3000:8080"
    extra_hosts:
      - "host.docker.internal:host-gateway"
    volumes:
      - ollama-openwebui-local:/app/backend/data
    networks:
      - ai-dev-environment-network

  ollama:
    container_name: ollama
    image: ollama/ollama:latest
    restart: always
    ports:
      - "11434:11434"
    volumes:
      - ollama-local:/root/.ollama
    networks:
      - ai-dev-environment-network

  ################################################
  # Chroma
  postgres:
    container_name: postgres
    image: postgres:14-alpine
    restart: always
    ports:
      - 5432:5432
    volumes:
      - ~/apps/postgres:/var/lib/postgresql/data
    environment:
      POSTGRES_USER: vectoradmin
      POSTGRES_PASSWORD: password
      POSTGRES_DB: vdbms
    networks:
      - ai-dev-environment-network

  chroma:
    container_name: chroma
    image: chromadb/chroma
    restart: always
    command: "--workers 1 --host 0.0.0.0 --port 8000 --proxy-headers --log-config chromadb/log_config.yml --timeout-keep-alive 30"
    environment:
      - IS_PERSISTENT=TRUE
      - CHROMA_SERVER_AUTHN_PROVIDER=${CHROMA_SERVER_AUTHN_PROVIDER}
      - CHROMA_SERVER_AUTHN_CREDENTIALS_FILE=${CHROMA_SERVER_AUTHN_CREDENTIALS_FILE}
      - CHROMA_SERVER_AUTHN_CREDENTIALS=${CHROMA_SERVER_AUTHN_CREDENTIALS}
      - CHROMA_AUTH_TOKEN_TRANSPORT_HEADER=${CHROMA_AUTH_TOKEN_TRANSPORT_HEADER}
      - PERSIST_DIRECTORY=${PERSIST_DIRECTORY:-/chroma/chroma}
      - CHROMA_OTEL_EXPORTER_ENDPOINT=${CHROMA_OTEL_EXPORTER_ENDPOINT}
      - CHROMA_OTEL_EXPORTER_HEADERS=${CHROMA_OTEL_EXPORTER_HEADERS}
      - CHROMA_OTEL_SERVICE_NAME=${CHROMA_OTEL_SERVICE_NAME}
      - CHROMA_OTEL_GRANULARITY=${CHROMA_OTEL_GRANULARITY}
      - CHROMA_SERVER_NOFILE=${CHROMA_SERVER_NOFILE}
    volumes:
      - chroma-data-local:/chroma/chroma
    ports:
      - 8000:8000
    healthcheck:
      # Adjust below to match your container port
      test: [ "CMD", "curl", "-f", "http://localhost:8000/api/v1/heartbeat" ]
      interval: 30s
      timeout: 10s
      retries: 3
    networks:
      - ai-dev-environment-network

  vector-admin:
    container_name: vector-admin
    image: mintplexlabs/vectoradmin:latest
    restart: always
    volumes:
      - "./.env:/app/backend/.env"
      - "../backend/storage:/app/backend/storage"
      - "../document-processor/hotdir/:/app/document-processor/hotdir"
    ports:
      - "3001:3001"
      - "3355:3355"
      - "8288:8288"
    env_file:
      - .env
    networks:
      - ai-dev-environment-network
    depends_on:
      - postgres

  ################################################
  # Flowise
  flowise:
    container_name: flowise
    image: flowiseai/flowise
    restart: always
    environment:
        - PORT=${PORT}
        - CORS_ORIGINS=${CORS_ORIGINS}
        - IFRAME_ORIGINS=${IFRAME_ORIGINS}
        - FLOWISE_USERNAME=${FLOWISE_USERNAME}
        - FLOWISE_PASSWORD=${FLOWISE_PASSWORD}
        - FLOWISE_FILE_SIZE_LIMIT=${FLOWISE_FILE_SIZE_LIMIT}
        - DEBUG=${DEBUG}
        - DATABASE_PATH=${DATABASE_PATH}
        - DATABASE_TYPE=${DATABASE_TYPE}
        - DATABASE_PORT=${DATABASE_PORT}
        - DATABASE_HOST=${DATABASE_HOST}
        - DATABASE_NAME=${DATABASE_NAME}
        - DATABASE_USER=${DATABASE_USER}
        - DATABASE_PASSWORD=${DATABASE_PASSWORD}
        - DATABASE_SSL=${DATABASE_SSL}
        - DATABASE_SSL_KEY_BASE64=${DATABASE_SSL_KEY_BASE64}
        - APIKEY_PATH=${APIKEY_PATH}
        - SECRETKEY_PATH=${SECRETKEY_PATH}
        - FLOWISE_SECRETKEY_OVERWRITE=${FLOWISE_SECRETKEY_OVERWRITE}
        - LOG_LEVEL=${LOG_LEVEL}
        - LOG_PATH=${LOG_PATH}
        - BLOB_STORAGE_PATH=${BLOB_STORAGE_PATH}
        - DISABLE_FLOWISE_TELEMETRY=${DISABLE_FLOWISE_TELEMETRY}
        - MODEL_LIST_CONFIG_JSON=${MODEL_LIST_CONFIG_JSON}
    ports:
        - '${PORT}:${PORT}'
    volumes:
        - ~/.flowise:/root/.flowise
    command: /bin/sh -c "sleep 3; flowise start"
    networks:
      - ai-dev-environment-network

volumes:
  ollama-openwebui-local:
    external: true
  ollama-local:
    external: true
  chroma-data-local:
    driver: local

networks:
  ai-dev-environment-network:
    driver: bridge
Then in the same folder, create a second file called “.env”, and copy and paste the text below. This is going to be your environment variables file:
################################################################
# FLOWISE
################################################################
PORT=3003
DATABASE_PATH=/root/.flowise
APIKEY_PATH=/root/.flowise
SECRETKEY_PATH=/root/.flowise
LOG_PATH=/root/.flowise/logs
BLOB_STORAGE_PATH=/root/.flowise/storage

################################################################
# VECTOR ADMIN
################################################################
SERVER_PORT=3001
JWT_SECRET="your-random-string-here"
INNGEST_EVENT_KEY="background_workers"
INNGEST_SIGNING_KEY="random-string-goes-here"
INNGEST_LANDING_PAGE="true"
DATABASE_CONNECTION_STRING="postgresql://vectoradmin:password@postgres:5432/vdbms"
Taking as example my project folder, “Projects/AI-Dev-Environment”, you should now have something like this:

Open the terminal, move into your folder, then run the command:
docker compose up -d
That’s it. Docker will download the images from internet, then will configure the containers based on the provided configuration file. When done, you should be able to open, from the web browser:
- Open WebUI (Ollama web client): http://localhost:3000
- Flowise: http://localhost:3003
- Vector Admin (Chroma web client): http://localhost:3001
Connecting to Ollama and Chroma
Before we can start playing around, there are still a few configuration steps to do in order to connect to Ollama and Chroma, as they don’t have an out-of.-the-box UI:
Connect to Open WebUI opening a browser window and typing http://localhost:3000

Sign up and create an account (it’s all stored locally). After login, you will see the home page:

Go to Settings (top-right corner, then “Settings”), select the tab “Connections” and fill up the information as per below:

Click “Save”, then select the next tab, “Models”:

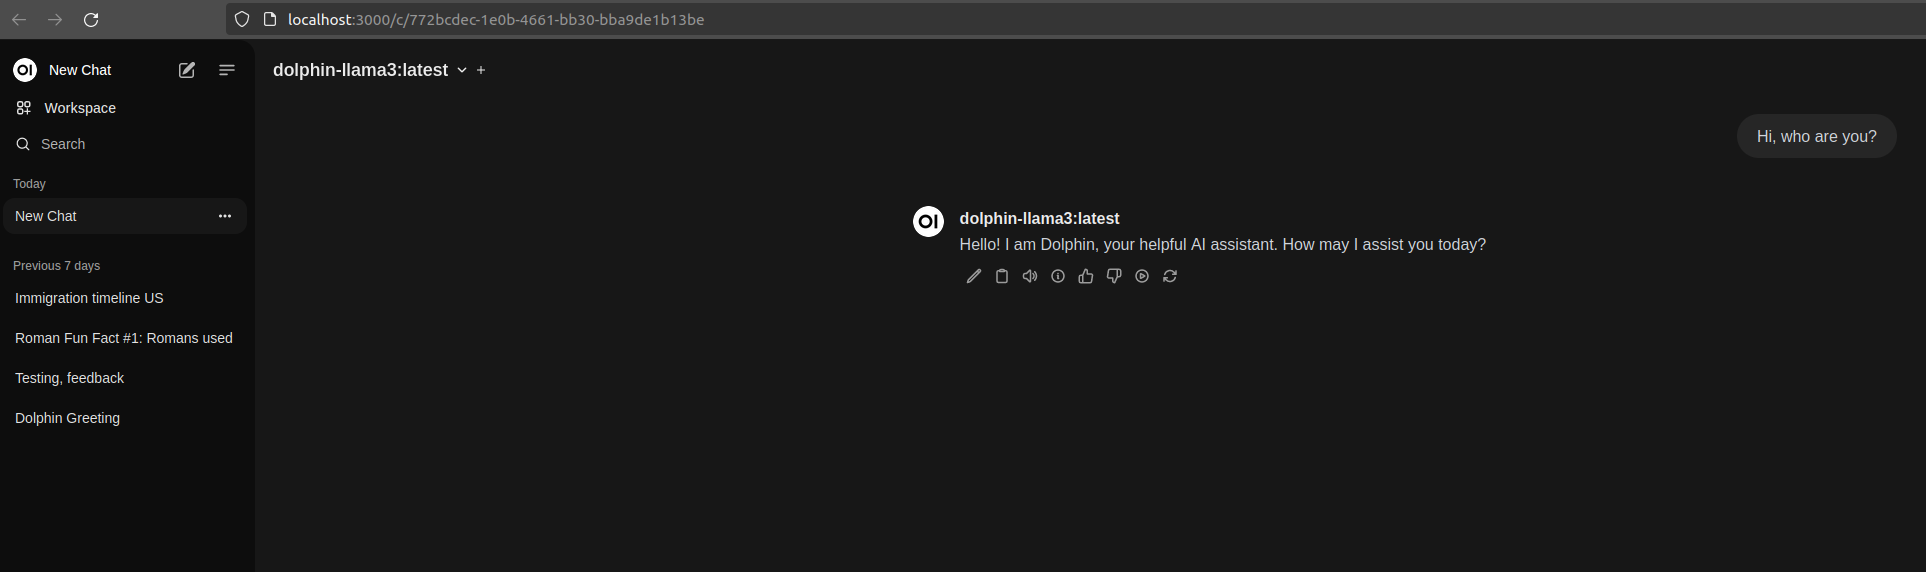
In “Pull a model from Ollama.com”, enter a model tag name, then click the button next to the text field, to download it. To find a supported model name, go to https://ollama.com/library and choose one. I’m currently using “dolphin-llama3” (https://ollama.com/library/dolphin-llama3), an uncensored model. Note the “B” near the model names… 3B, 8B, 70B, those are the model’s “billions of parameters”. Do not load a model having too many parameters, unless you have minimum 128GB of RAM. I’d suggest not more than 8B.
That’s all for Ollama. Go back to the home page, make sure your model is selected from the drop down “Select a model” on the top-left corner, and you can start chatting:
Now open Vector Admin at http://localhost:3001 . Connect to Chroma using the information displayed here below:

Click “Connect to Vector Database”. Create a new workspace in Vector Admin (mine below is called “testcollection”):
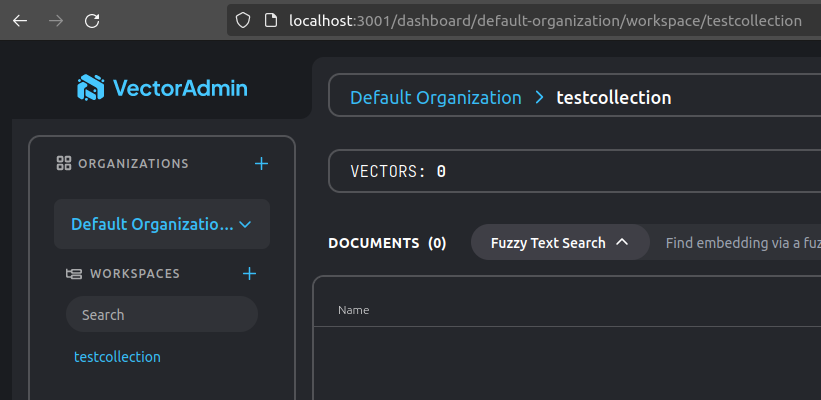
You can now verify that the collection actually exists in Chroma, calling Chroma’s API endpoint directly from the browser:

Recap
We got to the end of Part 1, and if you have executed all steps correctly you should now have your new shining Dev environment for creating Generative AI apps locally on your computer!

One thought on “Build your own GenAI Dev Environment”