Copilot Studio announcements at Microsoft Build 2025

In this post, and in the above-linked video,  I’ll give you an overview of all the new features of Copilot Studio announced during the just ended Microsoft Build 2025 conference, broken down by macro categories: multi-agent support, models, knowledge, tools, analytics, publishing, application lifecycle management.

Multi Agents

Multi-Agent Orchestration

Rather than relying on a single agent to do everything—or managing disconnected agents in silos—organizations can now build multi-agent systems in Copilot Studio, where agents delegate tasks to one another.

In the demo showed in my video, we have a banking agent that helps customers with their banking needs (for example checking account balances, transferring funds, report a stolen card and so on): previously you would have to build a single agent with all of these capabilities, now instead you can break a complex agent down into many connected agents each one specialized in a single functionality.

Adding a new agent is very easy: you can add an agent from Copilot Studio or the Microsoft 365 SDK, Microsoft Fabric, Azure AI Foundry. And in the future you’ll be able to connect to third party agents, via the A2A protocol.

Multilingual capability for Generative Orchestrator

Microsoft now provides a catalog of managed agents you can browse and install from within Copilot Studio. These agents are complete solutions, that you can use as template and customize for your needs.

Models

Copilot Tuning

A feature that was long-waited is Copilot Tuning. Copilot Tuning allows you to fine-tune large language models (LLMs) by using your own data. That’s implement in a task-specific fashion, let’s say in a controlled way, let’s see an example.

The first step is configuring your model. Click create new. Next, you’ll provide the model name, a description of the task you’d like to accomplish, and select a customization recipe tailored to the specific task type.

Next, you’ll give the model instructions to help it identify and prepare the most relevant data from your SharePoint sites.

Next, you need to provide the training data or knowledge, which forms the foundation of your fine tuned model. Currently only SharePoint sources are supported.

The final step in configuring is to define who can use the fine-tuned model to build agents in Microsoft 365 copilot by using security groups.

Now that your model is configured, you’re ready to prepare your training data with data labeling. Data labeling is the process of identifying the best examples that you want the model to learn from.

Once your data are processed, you’ll receive an email notification indicating that your data is ready for labelling.

The model you have fine-tuned can be used in M365 Copilot Agent Builder. So from the new M365 Copilot interface you select Create Agent, and you’ll be prompted to select the purpose of your agent: general purpose or task-specific. Select task specific to see the list of fine-tuned models that are available to you. You select a model, then from now on you proceed to building and customize your agent as usual.

Bring Your Own Model as a primary response model

We are now offered the possibility to fine-tune the LLM model used by Copilot Studio while building our agents, in two different ways: at agent level and at tool level. Let’s start with the agent level.

Once you have your agent initialized, go to the settings, in the generative AI tab, you have now a drop down to change the primary response model: you have some preset options plus the possibility to connect to AI Foundry and select your own published models from AI Foundry.

Bring Your Own Model as a primary response model

The second way how you can introduce a fine-tuned model in our Copilot Studio agents is via the prompt tool.

The prompt tool allows you to specify a task to be completed by Copilot Studio, describing it in natural language, and copilot studio will call it when it reckons necessary.

Now you have the possibility to specify a model for your prompt. You have some of the managed models already available for you, the ones that are curated by Microsoft. In addition it’s also possible to use one of 1900 plus Azure AI Foundry models based on your specific  use case.
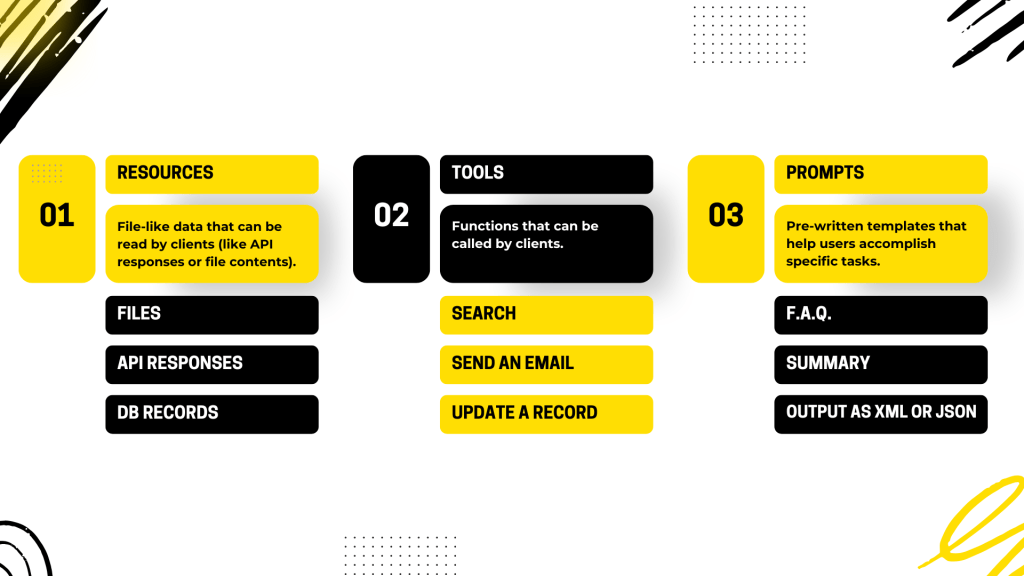
Knowledge

SharePoint lists, Knowledge Instructions

Copilot Studio is making progress on the Knowledge management as well. Now it supports SharePoint Lists, as well as uploading files grouping them together as a single knowledge base. Plus, now you have the option to write Instructions at knowledge level.

Tools

Computer Use

I think Computer Use is by far the most impressive tool added to Copilot Studio. Unfortunately it’s going to be available only for big customers in USA, at least for now.

Computer Use allows Copilot Studio Agents to interact with desktop apps and websites like a person would—clicking buttons, navigating menus, typing in fields, and adapting automatically as the interface changes. This opens the door to automating complex, user interface (UI)-based tasks like data entry, invoice processing, with built-in reasoning and full visibility into every step.

Dataverse Functions

You have also Dataverse Functions in preview, you can create one from the Power Apps portal, the function can have inputs and outputs and a formula containing your business logic: and then you can add that function to your agent selecting the Dataverse connector and choosing Unbounded Action.

You can configure it with the appropriate inputs and outputs, and then that becomes one more tool at your agent disposal.

Intelligent Approvals in Agent Flows

Agent Flows is a new tool we have been seeing for few weeks now, Microsoft is actively working on it and at the Build Conference they presented Intelligent Approvals.

Intelligent Approvals inserts an AI-powered decision-making stage directly within the Advanced Approval action. You simply provide natural language business rules and select your desired AI model: the model then evaluates submitted materials—images, documents, databases, or knowledge articles—to deliver a transparent approve or reject decision, complete with a detailed rationale.

Analytics

Evaluation Capabilities

The challenge in building any kind of agent is making sure it responds accurately when users ask different types of questions.

This is where the new evaluation capabilities in Copilot Studio come in. Now you can run automated tests against your agent directly from the testing panel. You can upload your set of questions, import queries from the chat history or even generate questions using AI. You can review and edit each question before running the test. Then you can run the evaluation and get a visual summary of the evaluation results.

Publishing

Publishing to WhatsApp and SharePoint

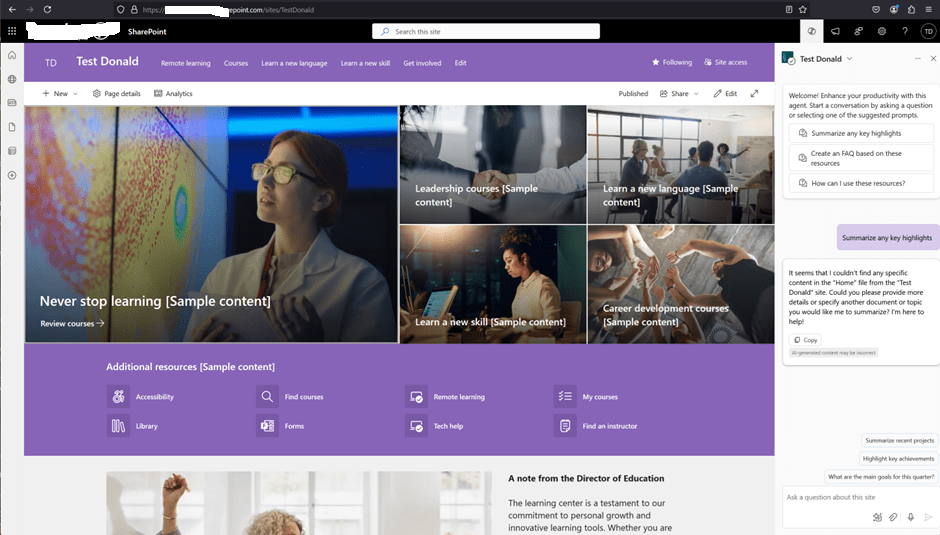
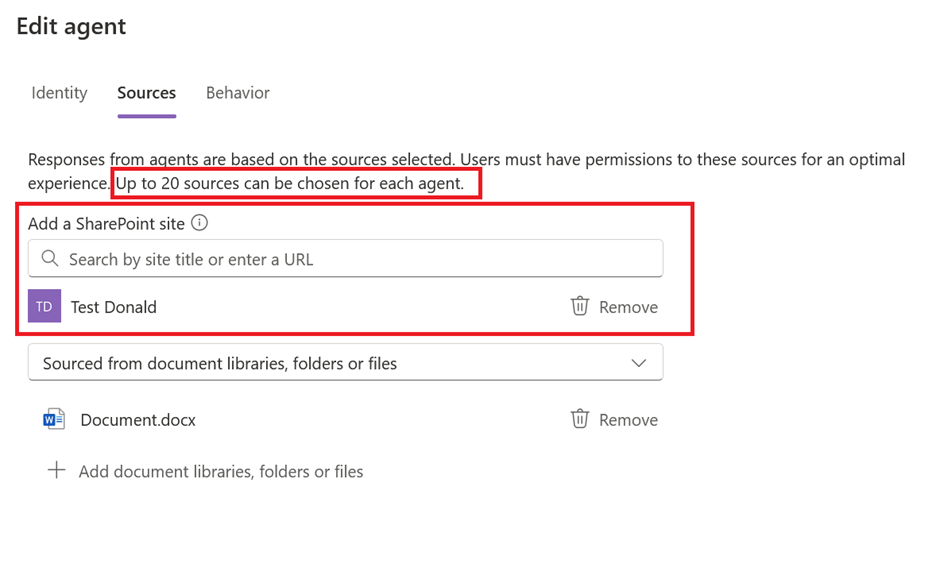
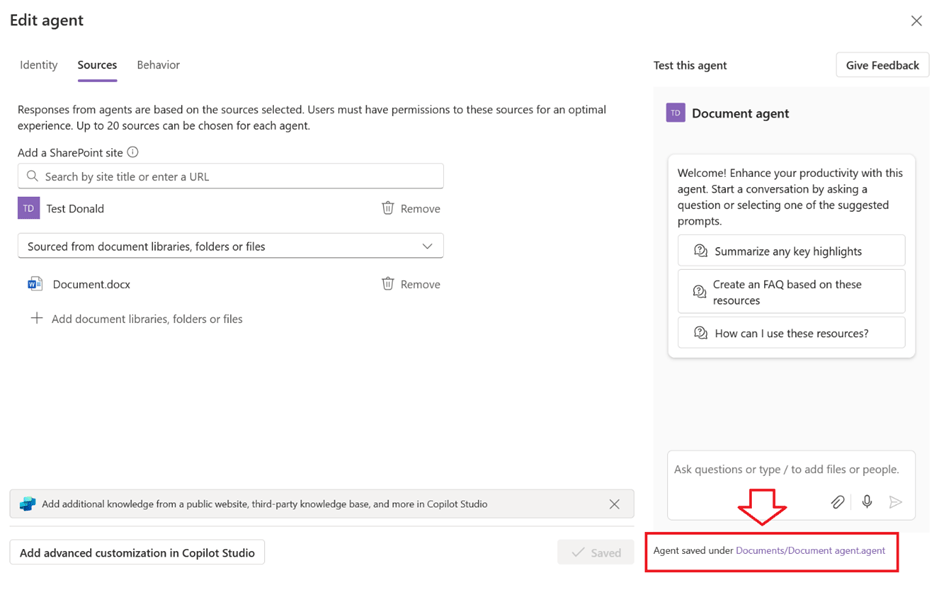
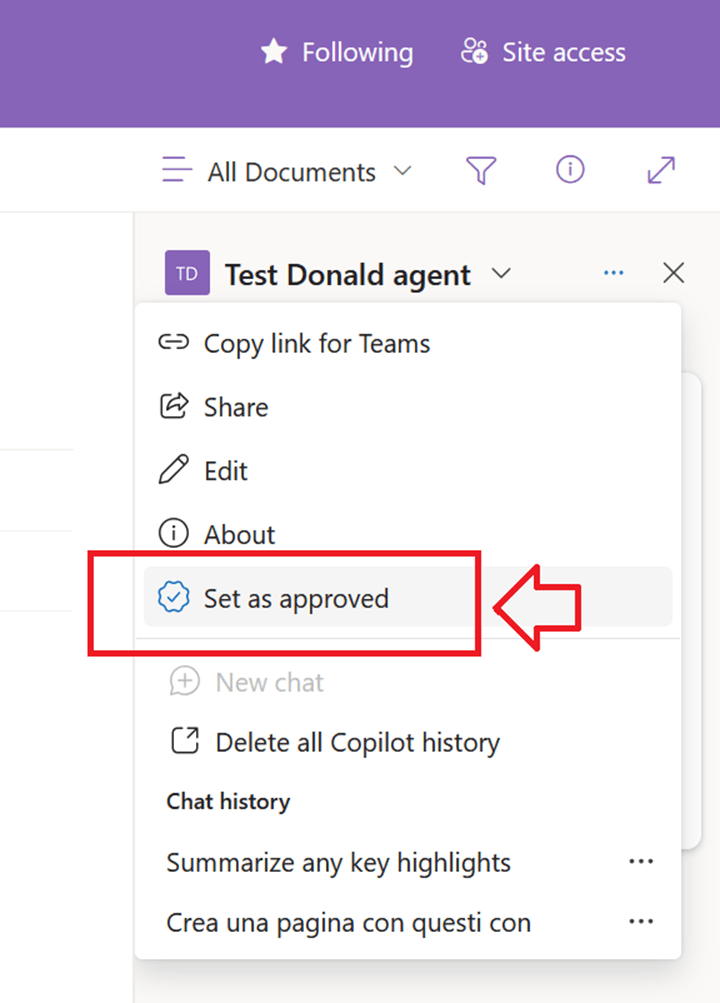
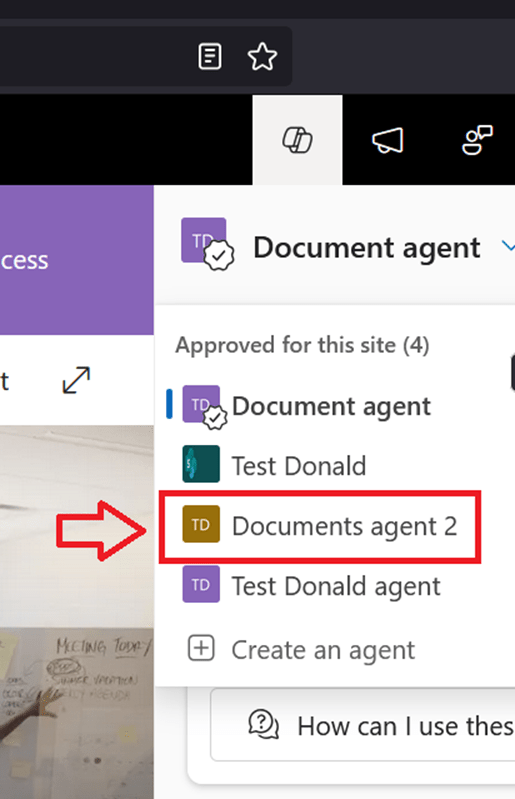
You can now publish your agent to WhatsApp and, more importantly, you can publish it to SharePoint! That’s another long-waited feature, because so far it wasn’t possible to have a SharePoint Agent with actions and other advanced features, now finally you can.

Let me just point out here that if you create your SharePoint Agent from SharePoint, you can’t customize it in Copilot Studio yet. So this works only if you start from Copilot Studio and then publish to SharePoint, the vice versa is not possible yet.

Code Interpreter

Generate a chart via Python code

Copilot Studio agents can now generate charts, and that’s done using the new Code Interpreter feature. Python code is generated automatically in reply to a prompt, you can see it and reuse it, and then it executes and generates the chart as the user’s answer.

ALM

Source code integration

With native source control integration you can take your agents in your environment and connect it to a source control repository, such as Azure DevOps, and make commits from the UI directly, so that everything you do is source controlled and is managed in the same way that you would expect any software to be managed.

Edit agent in VS Code

And finally, for the real nerds, the extension to Visual Studio Code allows you to clone agents to your machine locally and start editing the code behind it!

You’ll get here syntax errors highlighting, auto complete, documentation and so forth.

Copilot Studio + Google Search + MCP = Turbocharged AI agents

In my video below we’ll look at something that’s currently still unseen: we’re going to use the MCP SDK for C# and .NET to build an MCP server that leverages Google search, and we’ll exploit it in an AI agent created with Copilot Studio!

Model Context Protocol (MCP): Everything you need to know

Introduction

Model Context Protocol, MCP, the new open-source standard that organizes how AI agents interact with external data and systems.

In this post we will see how MCP works, what it is, how it is applied and what its current limitations are. Watch my video here above for a further practical example of an MCP server coded in C# and .NET.

The problem

So, what problem is MCP trying to solve here?

Let’s imagine we want to connect four smartphones to our computer to access their data: until some time ago, I would have needed four different cables with different connectors and maybe even four USB ports.

The solution

Then the USB-C standard came along and sorted everything out: now I only need one type of cable, one type of port, one charger, and I can connect and charge phones of any brand.

So, think of MCP as the USB-C for AI agents:

MCP standardizes the way AI agents can connect to data, tools, and external systems. The idea, which isn’t all that original, is to replace the plethora of custom integration methods—each API or data source having its own custom access method—with a single, consistent interface.

According to MCP specifications, an MCP server exposes standard operations, lists what it offers in a standardized manner, and can perform an action when an AI agent, the MCP client, requests it. On the client side, the AI agent reads what the server has to offer, understands the description, parameters, and the meaning of the parameters, and thus knows if and when it is useful to call the server and how to call it.

Here, if you think about it, it’s really a stroke of genius—simple yet powerful. On one side, I have a standard interface, and on the other side, I have an LLM that learns the server’s intents from the standard interface and thus understands if and when to use it. And all of this can even work automatically, without human intervention.

The MCP protocol

So, let’s get a bit practical. MCP helps us standardize three things, fundamentally:

  • Resources.
  • Tools.
  • Prompts.

Resources

An MCP server can provide resources to calling agents, and by resources, we mean context or knowledge base. For example, we can have an MCP server that encapsulates your database or a set of documents, and any AI agent can query your MCP server and obtain documents relevant to a prompt requested by its user. The brilliance here lies in having completely decoupled everything, meaning the MCP server has no knowledge of who is calling it, and AI agents use MCP servers without having hardcoded links or parameters in their own code.

Tools

Tools are simply functions that the MCP server exposes on its interface, nothing more, nothing less, and that AI agents can call.

Prompts

Prompts, finally, allow MCP servers to define reusable prompt templates and workflows, which AI agents can then present to users, as well as to the internal LLMs of the agent itself, to interact with the MCP server.

MCP marketplaces

The MCP standard was proposed by Anthropic last November, and within a few months, it has literally taken off. There are already numerous implementations of MCP servers scattered across the internet, covering practically everything. So, you can really go wild creating all sorts of AI agents simply by integrating these servers into your projects.

To facilitate the search for these MCP servers, some marketplaces have also emerged, and I mention the most important ones in this slide. I’ve counted five so far:

I would say the most comprehensive ones at the moment are the first two, MCP.so and MCPServers.org. However, it’s possible that Anthropic might decide to release its official marketplace in the near future.

Areas of improvement

We have seen how MCP is a very promising standard, but what are its weaknesses? If there are any. Well, there are a few at the moment, but that’s understandable since it’s a fairly young standard. Very young, I would say. Currently, the biggest limitation is the lack of a standard authentication and authorization mechanism between client and server.

Work is being done on it. The idea is to integrate OAuth 2.0 and 2.1. Another significant shortcoming is that there is currently no proper discovery protocol for the various MCP servers scattered across the network. Yes, we’ve seen that there are marketplaces, but if I wanted to allow my AI agent to perform discovery completely autonomously, to find the tools it needs on its own, well, that’s not possible yet.

We know that Anthropic is working on it. There will be a global registry sooner or later, and when it finally becomes available, we will definitely see another significant boost in the adoption of this protocol. Additionally, the ability to do tracing and debugging is missing, and that’s no small matter. Imagine, for example, that our AI agent calling these MCP servers encounters an error or something doesn’t go as expected:

What do we do? Currently, from the caller’s perspective, MCP servers are black boxes. If something goes wrong, it’s impossible for us to understand what’s happening. There’s also no standard for sequential calls and for resuming a workflow that might have been interrupted halfway due to an error.

For example, I have an AI agent that needs to make 10 calls to various MCP tools, and I encounter an error on the fifth call. What do I do? The management of the retry resume state is entirely the client’s responsibility, and there is no standard; everyone implements it in their own way. So, MCP is still young and has significant limitations. However, it is developed and promoted by Anthropic, has been well-received by the community, adopted by Microsoft, and also by Google, albeit with some reservations in this case.

Conclusions

So, I would say that the potential to become a de facto standard is definitely there, and it’s certainly worth spending time to study and adopt it in our AI agents.

Subscribe to my blog and YouTube channel for more ☺️

Goodbye LLM? Meta revolutionises AI with Large Concept Models!

In recent years, Large Language Models (LLM) have dominated the field of generative artificial intelligence. However, new limitations and challenges are emerging that require an innovative approach. Meta has recently introduced a new architecture called Large Concept Models (LCM), which promises to overcome these limitations and revolutionise the way AI processes and generates content.

In recent years, Large Language Models (LLM) have dominated the field of generative artificial intelligence. However, new limitations and challenges are emerging that require an innovative approach. Meta has recently introduced a new architecture called Large Concept Models (LCM), which promises to overcome these limitations and revolutionise the way AI processes and generates content.

Limitations of LLMs

LLMs, such as ChatGPT, Claude, Gemini etc. need huge amounts of data for training and consume a significant amount of energy. Furthermore, their ability to scale is limited by the availability of new data and increasing computational complexity. These models operate at the token level, which means they process input and generate output based on single word parts, making reasoning at more abstract levels difficult.

Introduction to Large Concept Models (LCM)

Large Concept Models represent a new paradigm in the architecture of AI models: instead of working on the level of tokens, LCMs work on the level of concepts. This approach is inspired by the way we humans process information, working on different levels of abstraction and concepts rather than single words.

How LCMs work

LCMs use an embedding model called SONAR, which supports up to 200 languages and can process both text and audio. SONAR transforms sentences and speech into vectors representing abstract concepts. These concepts are independent of language and mode, allowing for greater flexibility and generalisation capabilities.

Advantages of LCMs

Multi-modality and Multilingualism

LCMs are language and mode agnostic, which means they can process and generate content in different languages and formats (text, audio, images, video) without the need for re-training. This makes them extremely versatile and powerful.

Computational Efficiency

Since LCMs operate at the concept level, they can handle very long inputs and outputs more efficiently than LLMs. This significantly reduces energy consumption and the need for computational resources.

Zero-Shot generalisation

LCMs show an unprecedented zero-shot generalisation capability, being able to perform new tasks without the need for specific training examples. This makes them extremely adaptable to new contexts and applications.

Challenges and Future Perspectives

Despite promising results, LCMs still present some challenges. Sentence prediction is more complex than token prediction, and there is more ambiguity in determining the next sentence in a long context. However, continued research and optimisation of these architectures could lead to further improvements and innovative applications.

Conclusions

Large Concept Models represent a significant step forward in the field of artificial intelligence. With their ability to operate at the concept level, multimodality and multilingualism, and increased computational efficiency, LCMs have the potential to revolutionise the way AI processes and generates content. It will be interesting to see how this technology will develop and what new possibilities it will open up in the future of AI.

Messing around with SharePoint Agents

A customer asked me a question about SharePoint Agents that I was unable to answer. Having then realised that perhaps SharePoint Agents are less trivial than I thought, I decided to take the question head-on, doing some tests to see if there was an answer that makes sense.

A few days ago I wrote an article on the Copilot Agents (you can find it here), and as you can see from reading it, I relegated the SharePoint Agents to the end, giving them just a standard paragraph that in truth adds nothing to what we have already known for a while.

But then it happened that during a demo the other day, a customer asked me a question about SharePoint Agents that I was unable to answer. Having then realised that perhaps SharePoint Agents are less trivial than I thought, I decided to take the question head-on that afternoon, doing some tests to see if there was an answer that makes sense.

This article is the result of those thoughts, and assumes a basic knowledge of SharePoint Agents.

The question

The customer’s question was: ‘Having one agent per SharePoint site seems excessive and unmanageable to me, how can I instead create my own “official” agent once, and make it the default agent for all SharePoint sites?’.

Let’s try to give an answer

I created a test site, called “Test Donald“:

The site collection has its own default SharePoint Agent, having the same name as the site. This default agent does not have a corresponding .agent file in the site. Nor is there an option to edit the default agent. As we already know, however, I can create more agents, therefore I created a second one:

The new agent can be created directly from the menu, or by selecting a library or documents in a library:

(there must be at least 1 document in the library, otherwise the ‘Create an agent’ button won’t appear).

Please note that it is not (yet) possible to customise a SharePoint Agent in Copilot Studio:

A SharePoint Agent published on one site can also be based on knowledge from other SharePoint sites, but it’s important to bear in mind that only a maximum of 20 knowledge sources can be added:

The Edit popup shows the location of the saved agent:

Navigating the link will lead to the location of the associated .agent file:

The new agent thus created is Personal and as such only accessible by the user who created it. When the site owner approves it, it becomes Published (Approved) at the site level and therefore accessible to the other (licensed) users of the site:

Once the agent has been approved, the relevant file is physically moved automatically by SharePoint to Site Assets > Copilots > Approved:

The newly approved agent can now be set as the site’s default agent:

There can only be one default agent for any given site:

Back to the question, then: can I configure a SharePoint Agent once and then have it as the site default agent on all sites?

To answer the question, I have created a second site collection called ‘Test Donald 2’, thus a Documents Agent 2, which has both sites (Test Donald and Test Donald 2) as sources:

I then saved it, approved it, and set it as the default for Test Donald 2:

The next step then was to copy the relevant .agent file from Test Donald 2 to Test Donald:

The agent just copied appears correctly in the list as an approved agent on the Test Donald site:

And it is also possible to select it and set it as site default agent:

Conclusions

The answer then is Yes, you can have a default agent that is always the same on all SharePoint sites, provided you accept the following limitations:

  • 20-source limitation (inherent limitation of SharePoint Agents, at least for now).
  • Customisation in Copilot Studio not yet available.
  • Manual copying of the .agent file and manual approval as default agent.

The copying of the .agent file could be automated with a Power Automate flow associated with a provisioning process. However, approving it as the default agent currently is not possible via API.

Build your own GenAI Dev Environment

If we want to develop GenAI applications, we first need a development environment. In this post I will explain step by step how I set up mine. This will certainly save you a lot of time, as you will not have to go through the same gruelling trail and error approach that I had to go through.

Summary

If you want to develop GenAI applications, then first of all you’ll need a development environment. In this post I will explain step by step how I set up mine. This will certainly save you a lot of time, as you won’t have to go through the same gruelling trail and error approach that I had to.

What you will need

An LLM will have to run on your computer, so ideally you should have a fairly modern PC, better if with an Nvidia RTX 4000 series GPU. These graphics cards are in fact equipped with an architecture for parallel computing (Nvidia CUDA) and therefore lend themselves very well to running LLMs. Let’s say you can do also without, however the performance will be low. It is also important to have enough RAM memory, ideally minimum 32GB.

The specs of the computer I used for my Dev Environment:

  • CPU: Intel i9-10850K @ 3600MHz
  • GPU: NVidia RTX 4070 Super
  • RAM: 64GB
  • Operating System: Linux Ubuntu 22.04 LTS

Some recommendations to avoid wasting your time:

  • As the operating system, it is best to use Linux. Some of the things we are going to use work badly in Windows or are not supported at all.
  • If you decide to use Ubuntu Linux (the recommended choice), then use the 22.04 LTS version. Do not install a newer version, you will end up with malfunctions and incompatibilities, especially with Docker and Nvidia drivers.
  • Do not install Linux on a virtual machine, some of the software to be installed will malfunction or fail. Better to have a dedicated disk partition and configure dual boot with Windows. If you really don’t want to bother with the separate partition, then you can try WSL (Windows Subsystem for Linux) – I haven’t tried it so I can’t say if it works.
  • To avoid conflicts and compatibility issues, do not install Docker Desktop, just stay with Docker Engine and its command line.

Software Selection

In my previous article, I described the conceptual architecture of GenAI applications. On a logical level, we must now start to figure out the available products and decide which ones to use for each of the main components of our architecture, which I remind you being the following:

  • LLM Server
  • Orchestrator
  • Vector Database
  • User Interface

There is a flood of products in development out there: locally installable, cloud deployable, cloud services, free, paid and fremium. To simplify things, then, I’ll refer only to products that meet these requirements:

  • Open source.
  • Deployable locally.
  • Linux Debian compatible.
  • Docker compatible.
  • Licensed Apache 2.0 or otherwise installable in Production environments without having to pay a licence fee for commercial use.

LLM Servers

LLM (Large Language Model) servers are specialized servers that host and serve large language models, enabling the execution of complex natural language processing tasks. In GenAI apps they facilitate the generation of human-like text, automating content creation, customer interactions, and other language-based processes. The LLM servers I’ve evaluated for my Dev environment were:

After installing and examining them all, I decided to move on with Ollama only, which was the only one to be fully compatible with my chosen orchestrator (I’m going to talk about it in the next section). Kudos to Jan though, I found it to be really fast, way faster than the other three. Special mention also to LMStudio which provides a wider range of functionality and also seems to be more user friendly than Ollama.

Orchestrators

Orchestrators in GenAI apps manage the coordination and integration of various AI models and services, ensuring seamless operation and communication between different components. They streamline workflows, handle data preprocessing and postprocessing, and optimize resource allocation to enhance the overall efficiency and effectiveness of AI-driven tasks. The orchestrators I’ve evaluated for my Dev environment were:

I shelved Rivet because it doesn’t seem to support any of the LLM servers I am focusing on. Excluded also Langchain, because it is not visual and using it right now would have unnecessarily complicated my learning curve, as there is Flowise which is in fact a visual interface to Langchain. Very interesting instead are Langflow and Dify, potentially even better than Flowise, however I decided not to install them, Langflow because it’s still in preview (and it’s not yet clear to me whether the final version will be open source or paid for), Dify was discarded because it is open source however for production apps it will require a commercial licence.
Going by exclusion then, and also bearing in mind the compatibility with at least one of the LLM servers I looked at, I eventually opted for Flowise.

Vector Databases

Vector databases are specialized data storage systems designed to efficiently handle high-dimensional vector data, which is crucial for storing and querying embeddings generated by AI models. In GenAI apps, they enable rapid similarity searches and nearest neighbor queries, facilitating tasks like recommendation systems, image retrieval, and natural language processing. The vector DBs I’ve evaluated for my Dev environment were:

As far as I could see, all three are good products. Milvus and Qdrant appear to be more scalable than Chroma, however I’d say that the scalability of a GenAI app is not a pressing issue at the moment. Instead, I can anticipate that there was no way to get Milvus to work with Flowise, although the connector exists in Flowise. I will discuss this in more detail in the second part of the article; for the time being, we can be happy just with installing Chroma.

User Interfaces

GenAI apps utilize various user interfaces, including text-based interfaces, voice-based assistants, and multimodal interfaces that integrate text, voice, and visual inputs. These interfaces enhance user interaction by allowing more natural and intuitive communication, catering to diverse user preferences and contexts. For my Dev environment, so far I’ve evaluated these user interfaces:

The configuration steps provided below will install only Open WebUI, you can still install AnythingLLM separately though, to play around with LLM models, as it can also work standalone.

Installation Steps

Following the steps below you will get a fully configured Dev environment, running locally, with the following products installed:

  • Ollama
  • Open WebUI
  • Chroma
  • Flowise

IMPORTANT: The commands and configuration files below assume your host operating system is Ubuntu Linux 22.04. Some changes or tweaks may be necessary if you’re running on Windows, or on another version of Linux, or on Mac OS.

Installing Docker

Make sure the Docker Engine is installed:

Next, install the Nvidia Container Toolkit:

To simplify the execution of Docker commands from now on, you can run it rootless:

Configuration files

Create a folder on your Home directory, then save the code below as “compose.yaml”, this is going to be your Docker Compose configuration:

version: '3.9'

services:
  ################################################
  # Ollama
  openWebUI:
    container_name: ollama-openwebui
    image: ghcr.io/open-webui/open-webui:main
    restart: always
    ports:
      - "3000:8080"
    extra_hosts:
      - "host.docker.internal:host-gateway"
    volumes:
      - ollama-openwebui-local:/app/backend/data
    networks:
      - ai-dev-environment-network

  ollama:
    container_name: ollama
    image: ollama/ollama:latest
    restart: always
    ports:
      - "11434:11434"
    volumes:
      - ollama-local:/root/.ollama
    networks:
      - ai-dev-environment-network

  ################################################
  # Chroma
  postgres:
    container_name: postgres
    image: postgres:14-alpine
    restart: always
    ports:
      - 5432:5432
    volumes:
      - ~/apps/postgres:/var/lib/postgresql/data
    environment:
      POSTGRES_USER: vectoradmin
      POSTGRES_PASSWORD: password
      POSTGRES_DB: vdbms
    networks:
      - ai-dev-environment-network

  chroma:
    container_name: chroma
    image: chromadb/chroma
    restart: always
    command: "--workers 1 --host 0.0.0.0 --port 8000 --proxy-headers --log-config chromadb/log_config.yml --timeout-keep-alive 30"
    environment:
      - IS_PERSISTENT=TRUE
      - CHROMA_SERVER_AUTHN_PROVIDER=${CHROMA_SERVER_AUTHN_PROVIDER}
      - CHROMA_SERVER_AUTHN_CREDENTIALS_FILE=${CHROMA_SERVER_AUTHN_CREDENTIALS_FILE}
      - CHROMA_SERVER_AUTHN_CREDENTIALS=${CHROMA_SERVER_AUTHN_CREDENTIALS}
      - CHROMA_AUTH_TOKEN_TRANSPORT_HEADER=${CHROMA_AUTH_TOKEN_TRANSPORT_HEADER}
      - PERSIST_DIRECTORY=${PERSIST_DIRECTORY:-/chroma/chroma}
      - CHROMA_OTEL_EXPORTER_ENDPOINT=${CHROMA_OTEL_EXPORTER_ENDPOINT}
      - CHROMA_OTEL_EXPORTER_HEADERS=${CHROMA_OTEL_EXPORTER_HEADERS}
      - CHROMA_OTEL_SERVICE_NAME=${CHROMA_OTEL_SERVICE_NAME}
      - CHROMA_OTEL_GRANULARITY=${CHROMA_OTEL_GRANULARITY}
      - CHROMA_SERVER_NOFILE=${CHROMA_SERVER_NOFILE}    
    volumes:      
      - chroma-data-local:/chroma/chroma
    ports:
      - 8000:8000
    healthcheck:
      # Adjust below to match your container port
      test: [ "CMD", "curl", "-f", "http://localhost:8000/api/v1/heartbeat" ]
      interval: 30s
      timeout: 10s
      retries: 3
    networks:
      - ai-dev-environment-network

  vector-admin:
    container_name: vector-admin
    image: mintplexlabs/vectoradmin:latest
    restart: always    
    volumes:
      - "./.env:/app/backend/.env"
      - "../backend/storage:/app/backend/storage"
      - "../document-processor/hotdir/:/app/document-processor/hotdir"
    ports:
      - "3001:3001"
      - "3355:3355"
      - "8288:8288"
    env_file:
      - .env
    networks:
      - ai-dev-environment-network
    depends_on:
      - postgres

  ################################################
  # Flowise
  flowise:
    container_name: flowise
    image: flowiseai/flowise
    restart: always
    environment:
        - PORT=${PORT}
        - CORS_ORIGINS=${CORS_ORIGINS}
        - IFRAME_ORIGINS=${IFRAME_ORIGINS}
        - FLOWISE_USERNAME=${FLOWISE_USERNAME}
        - FLOWISE_PASSWORD=${FLOWISE_PASSWORD}
        - FLOWISE_FILE_SIZE_LIMIT=${FLOWISE_FILE_SIZE_LIMIT}
        - DEBUG=${DEBUG}
        - DATABASE_PATH=${DATABASE_PATH}
        - DATABASE_TYPE=${DATABASE_TYPE}
        - DATABASE_PORT=${DATABASE_PORT}
        - DATABASE_HOST=${DATABASE_HOST}
        - DATABASE_NAME=${DATABASE_NAME}
        - DATABASE_USER=${DATABASE_USER}
        - DATABASE_PASSWORD=${DATABASE_PASSWORD}
        - DATABASE_SSL=${DATABASE_SSL}
        - DATABASE_SSL_KEY_BASE64=${DATABASE_SSL_KEY_BASE64}
        - APIKEY_PATH=${APIKEY_PATH}
        - SECRETKEY_PATH=${SECRETKEY_PATH}
        - FLOWISE_SECRETKEY_OVERWRITE=${FLOWISE_SECRETKEY_OVERWRITE}
        - LOG_LEVEL=${LOG_LEVEL}
        - LOG_PATH=${LOG_PATH}
        - BLOB_STORAGE_PATH=${BLOB_STORAGE_PATH}
        - DISABLE_FLOWISE_TELEMETRY=${DISABLE_FLOWISE_TELEMETRY}
        - MODEL_LIST_CONFIG_JSON=${MODEL_LIST_CONFIG_JSON}
    ports:
        - '${PORT}:${PORT}'
    volumes:
        - ~/.flowise:/root/.flowise
    command: /bin/sh -c "sleep 3; flowise start"
    networks:
      - ai-dev-environment-network

volumes:
  ollama-openwebui-local:
    external: true
  ollama-local:
    external: true
  chroma-data-local:
    driver: local

networks:
  ai-dev-environment-network:
    driver: bridge

Then in the same folder, create a second file called “.env”, and copy and paste the text below. This is going to be your environment variables file:

################################################################
# FLOWISE
################################################################
PORT=3003
DATABASE_PATH=/root/.flowise
APIKEY_PATH=/root/.flowise
SECRETKEY_PATH=/root/.flowise
LOG_PATH=/root/.flowise/logs
BLOB_STORAGE_PATH=/root/.flowise/storage

################################################################
# VECTOR ADMIN
################################################################
SERVER_PORT=3001
JWT_SECRET="your-random-string-here"
INNGEST_EVENT_KEY="background_workers"
INNGEST_SIGNING_KEY="random-string-goes-here"
INNGEST_LANDING_PAGE="true"
DATABASE_CONNECTION_STRING="postgresql://vectoradmin:password@postgres:5432/vdbms"

Taking as example my project folder, “Projects/AI-Dev-Environment”, you should now have something like this:

Open the terminal, move into your folder, then run the command:

docker compose up -d

That’s it. Docker will download the images from internet, then will configure the containers based on the provided configuration file. When done, you should be able to open, from the web browser:

Connecting to Ollama and Chroma

Before we can start playing around, there are still a few configuration steps to do in order to connect to Ollama and Chroma, as they don’t have an out-of.-the-box UI:

Connect to Open WebUI opening a browser window and typing http://localhost:3000

Sign up and create an account (it’s all stored locally). After login, you will see the home page:

Go to Settings (top-right corner, then “Settings”), select the tab “Connections” and fill up the information as per below:

Click “Save”, then select the next tab, “Models”:

In “Pull a model from Ollama.com”, enter a model tag name, then click the button next to the text field, to download it. To find a supported model name, go to https://ollama.com/library and choose one. I’m currently using “dolphin-llama3” (https://ollama.com/library/dolphin-llama3), an uncensored model. Note the “B” near the model names… 3B, 8B, 70B, those are the model’s “billions of parameters”. Do not load a model having too many parameters, unless you have minimum 128GB of RAM. I’d suggest not more than 8B.

That’s all for Ollama. Go back to the home page, make sure your model is selected from the drop down “Select a model” on the top-left corner, and you can start chatting:

Now open Vector Admin at http://localhost:3001 . Connect to Chroma using the information displayed here below:

Click “Connect to Vector Database”. Create a new workspace in Vector Admin (mine below is called “testcollection”):

You can now verify that the collection actually exists in Chroma, calling Chroma’s API endpoint directly from the browser:

Recap

We got to the end of Part 1, and if you have executed all steps correctly you should now have your new shining Dev environment for creating Generative AI apps locally on your computer!

Quick introduction to GenAI apps

Summary

Generative Artificial Intelligence (GenAI) applications are transforming our world, making it possible to create text, images, music, and videos automatically.

Using advanced algorithms and neural networks, these technologies are revolutionizing areas such as art, writing, design, and video games.

In this series, I’m going to share the path I am taking to learn these technologies, how I am approaching the study, how I am setting up my development environment, what applications I intend to study, what I intend to develop, and how I am developing them. I will be discussing both open-source technologies and their equivalents in Microsoft’s Modern Work (Microsoft Copilot for Microsoft 365), as it’s part of my daily job.

Generative AI is evolving at the speed of light. There are numerous concepts to learn, with standards, tools, and frameworks springing up like mushrooms. What I write today could become obsolete by tomorrow morning. Therefore, I'm going to write this series following three guiding principles:
1. I will focus on the grand scheme of things, identifying the fundamental concepts and technologies to learn and concentrating on those without digressing. However, I will leave references in the articles for those who wish to delve deeper.
2. I will condense in my articles the results of my tests, projects, and experiments, explaining the path I followed to implement certain solutions or solve certain problems, while also mentioning possible alternative methods.
3. I will strive to keep these posts up-to-date with regular reviews.

More than ChatGPT…

At the heart of ChatGPT is an LLM (Large Language Model), an artificial intelligence model specialized in natural language processing. ChatGPT, as well as Claude, Gemini, LLAMA, and many others, are trained on large textual datasets and use deep learning techniques to ‘understand’ and generate text similarly to how a human would. LLMs can perform a variety of language-related tasks, including machine translation, sentence completion, creative writing, code programming, answering questions, and more.

With GenAI apps, we take all of this a step further, and LLMs become the core of our applications. These applications can do things that were unthinkable until recently, such as looking up information in our books in near real-time, translating into another language using our talking avatar, holding a phone conversation on our behalf, suggesting a recipe for dinner with ingredients we have at home, helping our child with homework, or finding us the cheapest tickets to our next destination (and buying them for us too!).

But how many types of GenAI apps exist? What do they comprise? What is their architecture? As mentioned, when it comes to AI, what is true today may no longer be true tomorrow morning. Let’s say that at the moment we can imagine a pyramid in which, at the base, we find LLMs pure and simple: mostly open-source models, created by OpenAI, Google, Facebook, Anthropic, Mistral, and others, with which we can interact by loading them into specialised servers such as Ollama, AnythingLLM, GPT4All to name the most famous open-source servers. Additionally, there are closed-source systems, such as OpenAI’s ChatGPT, Google Gemini, and Microsoft Copilot, which we use everyday, running the LLMs they themselves produce (in the case of Microsoft, the LLMs used are those of OpenAI).

RAGs

Immediately above this, we find RAG (Retrieval-Augmented Generation) apps, which are basically LLM servers to which we can provide additional context that they will then use to base their answers, citing the sources. For example, we can provide the RAG with the address of a website or one or more documents, and then ask the RAG to answer questions about that website or those documents. The analogy that is usually made here is that of a Court Judge who has a deep knowledge of the law but sometimes deals with a case so peculiar that it requires the advice of an expert witness. Here, the Judge is the LLM, and the expert is the RAG, whose expertise is the additional context on which the Judge relies to deal with the case.

In some respects, ChatGPT and similar models have already evolved to the stage of RAG. In their latest versions, they no longer limit themselves to being generalist LLMs. We can pass them files to be analyzed, summarized, and queried on, and they are also able to search for information on search engines themselves and cite sources in their answers.

We mere mortals cannot develop new LLMs, as it takes enormous computing resources to train them. But we can exploit open-source LLMs to develop RAGs.

AI Agents

Above the RAGs, we find the Agents, and here things start to get interesting. Agents have an LLM and execution contexts, but they also have tools, enabling them to decide for themselves how to react to a certain situation using the tools at their disposal. An AI Agent, for instance, is an app that we ask to book us the cheapest trip to a certain destination based on our preferences (preferences that the Agent already knows). An AI Agent is a fraud detection system used in banks, an automated customer service operator, Tesla’s autonomous driving system, and so on. New use cases appear almost daily.

Microsoft Copilot itself is evolving very rapidly from RAG to AI Agent (I will discuss Microsoft Copilot in more detail in other posts).

But can we mere mortals, with only a small computer with an overpriced Nvidia GPU and Visual Studio Code, create an AI Agent? Yes, we can!

Above and beyond the Agents…

And how does the pyramid end? Is there anything above the AI Agents? Above AI Agents, I would put LLM OS—something that may not exist yet but should be coming soon (who said ChatGPT 5?), first theorised by Andrej Karpathy, a kind of Operating System where the AI Agents will be its apps…

Above all, I’d only imagine the AGI (Artificial General Intelligence), the last stage, the artificial brain—something far more intelligent than human beings.

<IMHO>Something that, frankly, once in the hands of the people who govern us, will only create disasters.</IMHO>

Architecture of GenAI apps

An app is usually made of at least three things: business logic, data, and user interface. GenAI apps are no exception.

Business Layer

We have said that a GenAI app is practically an LLM “on steroids”: at the heart of the business layer is, therefore, the LLM server. This server specifies the LLM to be used and exposes the primitives for interacting with it, usually through REST APIs, to the rest of the business layer. However, the business layer of GenAI apps is also made up of a second component: the Orchestrator. The Orchestrator is fundamental in managing the multiple interactions with the LLM and the data layer, as well as the interfaces with external APIs and multiple prompts.

Data Layer

Additional contexts (files, external data sources) available to the system via various types of connectors, the implementation of which varies from case to case, form part of the data layer. In order for these external sources to be processed by the LLM, however, a further component must be introduced: the Vector Database.

Vector DatabaseS

In simple terms, Vector Databases allow for the storage and retrieval of vector representations of data, enabling efficient similarity searches and data retrieval for the LLM. These representations of data are called Vector Embeddings, i.e. pieces of information (a block of text, an image) translated into matrices of numbers in such a way that they are comprehensible to an LLM. Vector embeddings are a way to convert words and sentences and other data into numbers that capture their meaning and relationships. They represent different data types as points in a multidimensional space, where similar data points are clustered closer together.

Presentation Layer

The user interface of a GenAI app has at the very least a chat window, where we can write prompts and receive output (answers to our questions, outcome of actions taken by the agent, etc.).

With the advent of Chat GPT 4o, however, we are also starting to see multimodal user interfaces, i.e. capable of handling not only textual input/output but also audio, video and images.

Conceptual Architectures

In summary, the conceptual architecture of a RAG app can be schematised as follows:

The Agent’s one is very similar, in addition there are just the logic concerning the selection and operation of tools, as well as a more elaborate handling of prompt templates:

Of course what I’ve just described is the basic architecture: depending on the type of app and the problem to be solved though, it may be necessary to introduce new concepts, new elements, and things may become exponentially more complex.

As I said at the beginning, however, these topics are new to everyone and constantly evolving, so I think it is better to start with the fundamentals and what is certain, and then gradually add complexity and test new paths.

Recap

In this article, we have seen what GenAI apps are, their types (RAG, Agent, LLM OS), and then outlined the conceptual architecture of GenAI apps, mentioning their main components and interactions.

Coming up next

The next articles of this series will talk about:

  • My open source setup for the development environment.
  • Tools for the development of GenAI apps.
  • Which GenAI apps I am trying to develop.
  • Copilot for Microsoft 365 and GenAI applied to Modern Work.
  • Advanced GenAI (in-depth prompt engineering, LLMOps, etc.).
  • Review of the main Low-Code platforms for building GenAI apps.